CI/CD에서 CD를 아르고로 선택한 이유는 인프라 변경 사항에 대한 추적이 좀 가능 하기도 하며 또한 구성 및 배포가 쉽다라고 생각 했다.
설치 환경은 Tanzu 1.4 버전으로 진행
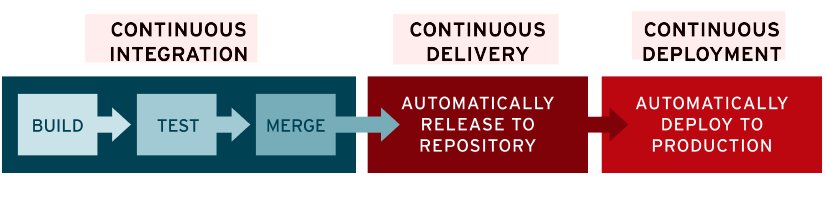
CI/CD는 애플리케이션 개발 단계를 자동화하여 애플리케이션을 보다 짧은 주기로 고객에게 제공한다.
CI (Continuous Integration) CI를 통해 개발자들은 코드 변경사항을 공유 브랜치로 다시 병합하는 작업을 더욱 수월하게 자주 수행 할 수 있다.
CD (Continuous Delivery || Continuous Deploy) 두용어는 상호 교환적으로 사용됨.
Continuous Deliver의 경우 코드 변경 , 병합으로부터 Prodcution에 적합한 빌드를 제공하여 모든 단계에 테스트 및 릴리스를 자동화한다.
Continuous Deploy는 어플리케이션을 프로덕션으로 릴리스 작업을 자동화
CICD
참고 문헌
helm 설치,
vSphere : 7.0
vSAN
NSX : 3.2
AVI : 21.1.1
Tanzu 1.4
Namespace 생성
1
kubectl create ns argocd
Helm Repo 등록
1
2
helm repo add argo https://argoproj.github.io/argo-helm
helm repo update
Optional : Helm 에서 value 값을 수정 하고 싶으면 별도로 다운로드
1
helm show values argo/argo-cd > argocd.yaml
Optional : HTTPS로 구성을 하려고 한다면 인증서 등록을 해준다.
1
kubectl create secret tls argo-tls --cert= /data/cert/yourdomain.com.crt --key= /data/cert/yourdomain.com.key -n argocd
수정이 필요 없으면 바로 시작 하면 된다.
1
helm install argocd argo/argo-cd -n argo
접속 하기 위해 Portfoward를 하자
1
kubectl port-forward service/argocd-server -n argo 8080:443
ID는 admin 이며, PW는 별도의 명령으로 알아 낼수 있다.
1
kubectl -n argo get secret argocd-initial-admin-secret -o jsonpath = "{.data.password}" | base64 -d
접속 페이지
User Info
LDAP을 연동 하기 위해선 values 값을 다운로드 하는 것이 좋다.
1
2
helm show values argo/argo-cd > argocd.yaml
vi argocd.yaml
다운로드 받은 Yaml파일중에 dex부분을 수정한다, 없으면 추가 한다.
 1
 2
 3
 4
 5
 6
 7
 8
 9
10
11
12
13
14
15
16
17
18
19
20
21
22
23
24
25
26
27
dex.config: |
connectors:
- type: ldap
name: Ldap
id: ldap
config:
# Ldap server address
host: tanzu-dns.tkg.io:389
insecureNoSSL: true
insecureSkipVerify: true
startTLS: false
bindDN: " $dex .ldap.bindDN"
bindPW: " $dex .ldap.bindPW"
usernamePrompt: Username
userSearch:
baseDN: "ou=tanzu,dc=tkg,dc=io"
filter: ( objectClass = person)
username: sAMAccountName
idAttr: DN
emailAttr: mail
nameAttr: sAMAccountName
groupSearch:
baseDN: "ou=tanzu,dc=tkg,dc=io"
filter: ( objectClass = person)
userAttr: DN
groupAttr: member
nameAttr: name
그리고 Secret을 생성 해준다.
1
2
kubectl -n argo patch secrets argocd-secret --patch "{\"data\":{\"dex.ldap.bindPW\":\" $( echo 'Passw0rd' | base64 -w 0) \"}}"
kubectl -n argo patch secrets argocd-secret --patch "{\"data\":{\"dex.ldap.bindDN\":\" $( echo cn = administrator,cn= users,dc= tanzu,dc= io | base64 -w 0) \"}}"
HELM 실행
1
2
3
helm install argocd argo/argo-cd -n argo \
[ 0]= --insecure \
접속 하기 위해 Portfoward를 하자
1
kubectl port-forward service/argocd-server -n argo 8080:443
ID는 admin 이며, PW는 별도의 명령으로 알아 낼수 있다.
1
kubectl -n argo get secret argocd-initial-admin-secret -o jsonpath = "{.data.password}" | base64 -d
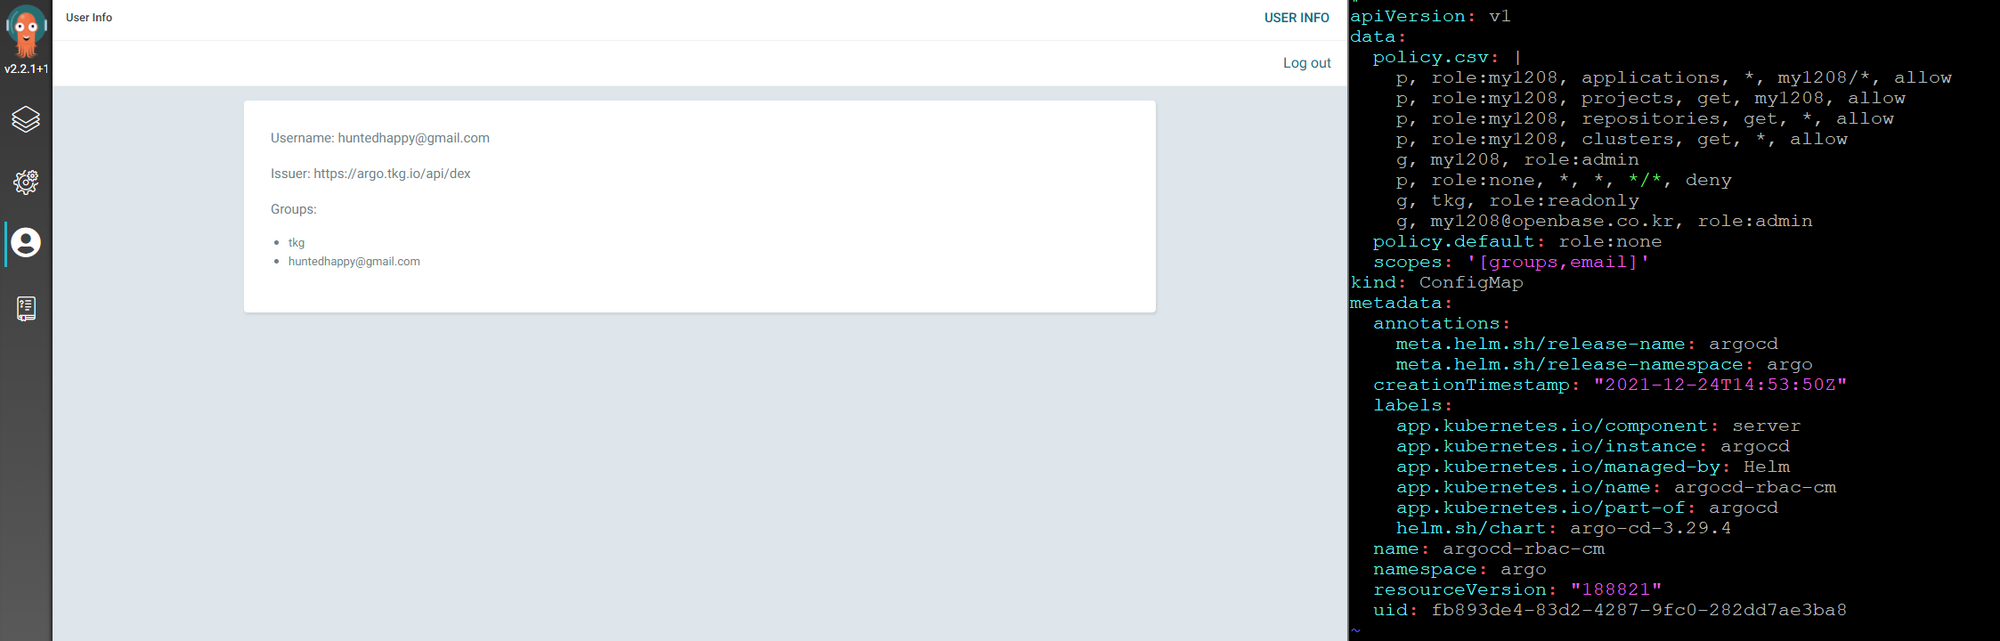
RBAC을 적용 해주어 Admin 권한으로 접속이 되는지 확인
confimap을 수정 해서 RBAC의 대한 설정을 해준다.
1
kubectl edit cm argocd-rbac-cm -n argo
configmap을 수정 하면 아래 내용이 있으면 수정 하고 없으면 추가 해준다.
 1
 2
 3
 4
 5
 6
 7
 8
 9
10
11
12
13
apiVersion: v1
data:
  policy.csv: |
    p, role:my1208, applications, *, my1208/*, allow
    p, role:my1208, projects, get, my1208, allow
    p, role:my1208, repositories, get, *, allow
    p, role:my1208, clusters, get, *, allow
    g, my1208, role:admin
    p, role:none, *, *, */*, deny
    g, tkg, role:readonly
    g, my1208@openbase.co.kr, role:admin
  policy.default: role:none
  scopes: '[groups,email]'
Pod를 재 실행 해 준다.
1
2
delete = ` kubectl get pod -n argo | grep -v repo | egrep 'server|dex' | awk '{print $1}' | xargs echo `
kubectl delete pod $delete -n argo
접속 화면
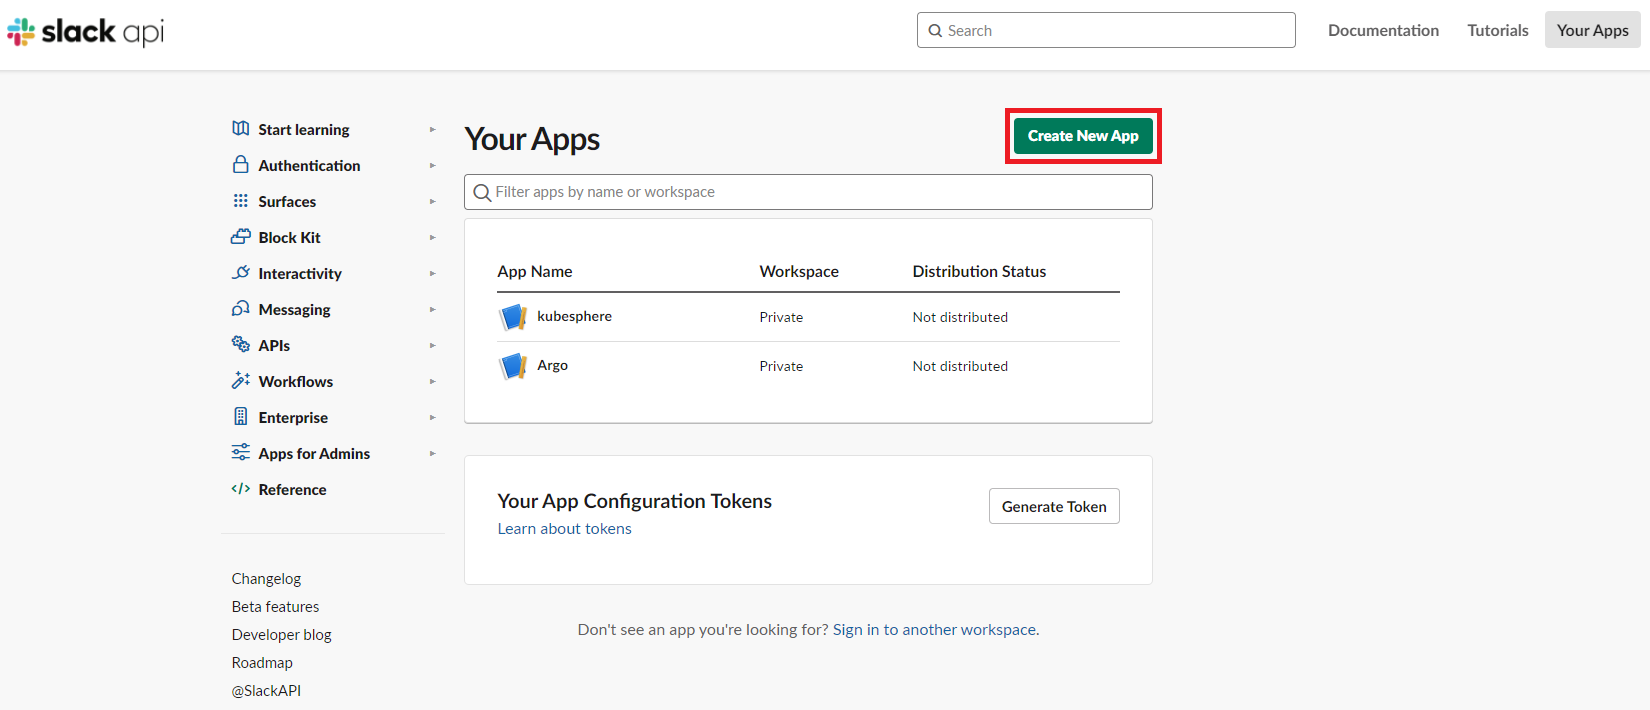
메시지를 SLACK으로 받기 위해 연동
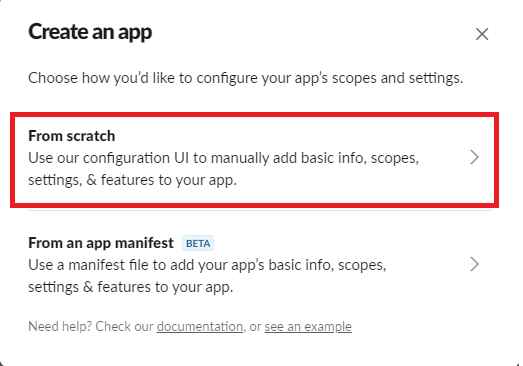
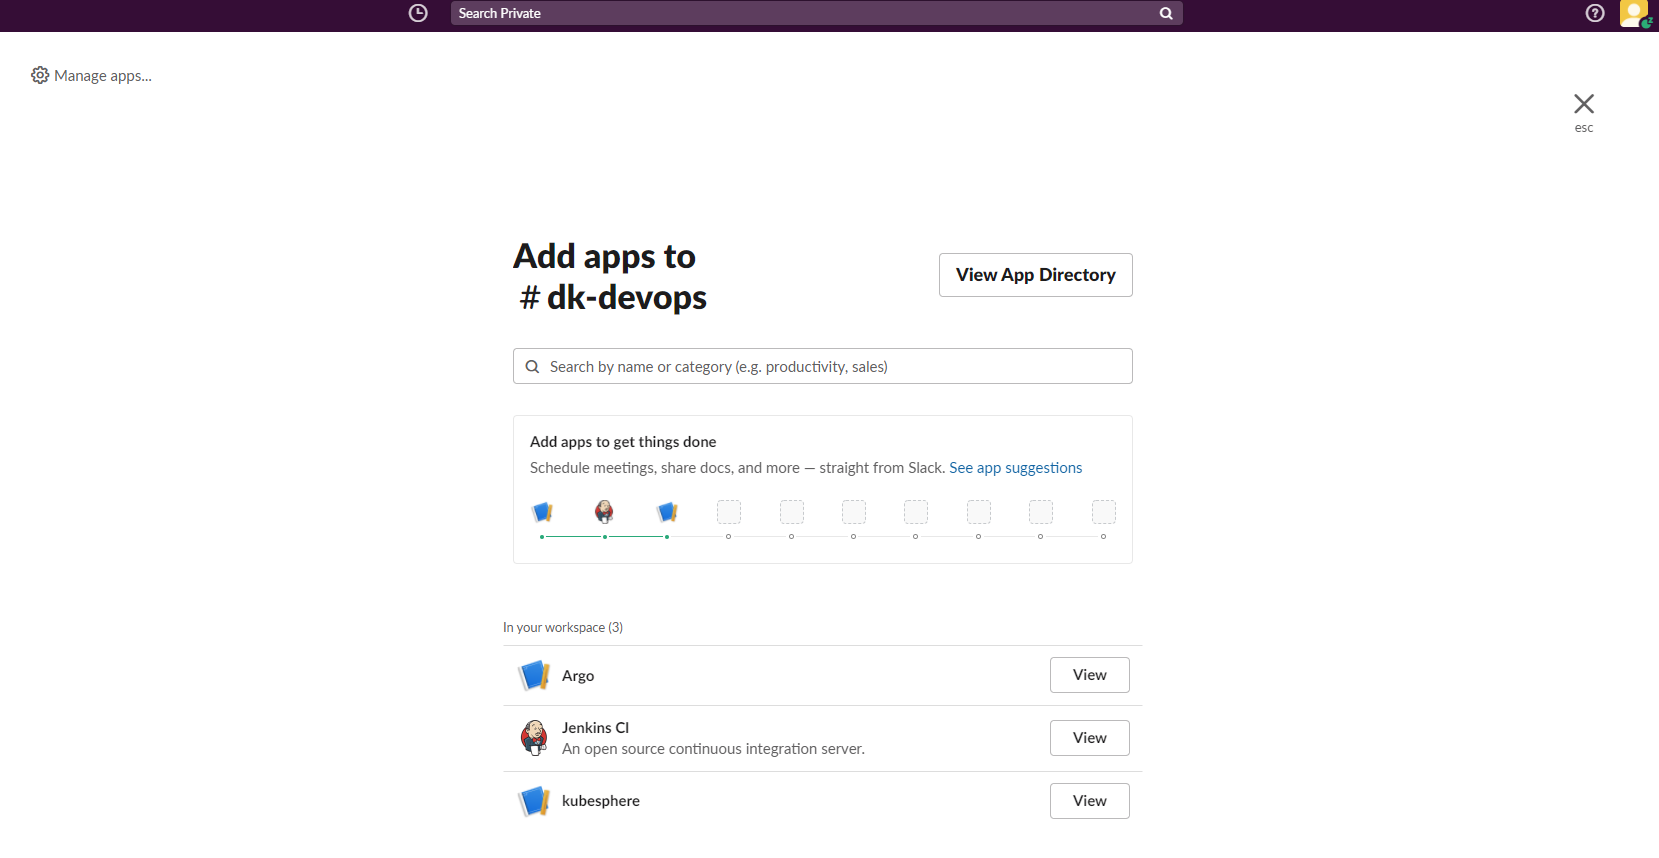
APP 추가#1
APP 추가#2
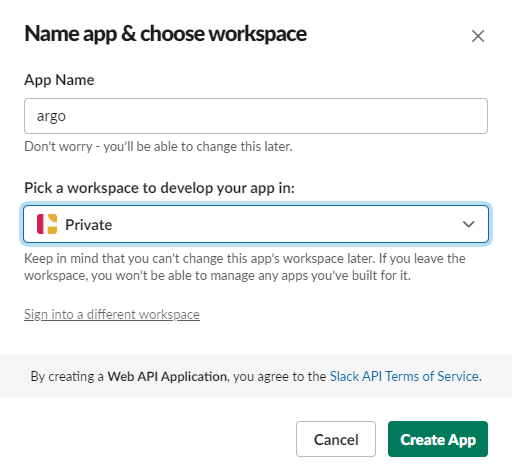
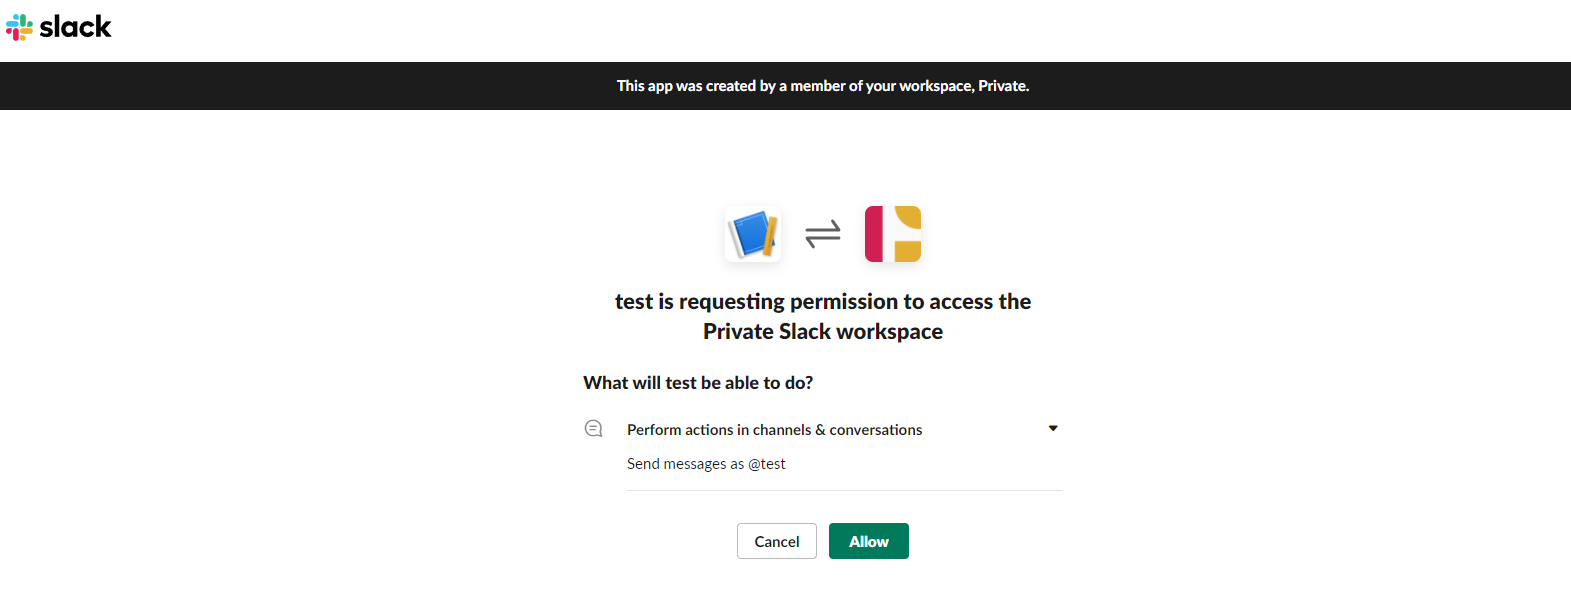
APP을 추가하기 위해 APP의 Name 설정 및 workspace를 선택 한다.
APP 추가#3
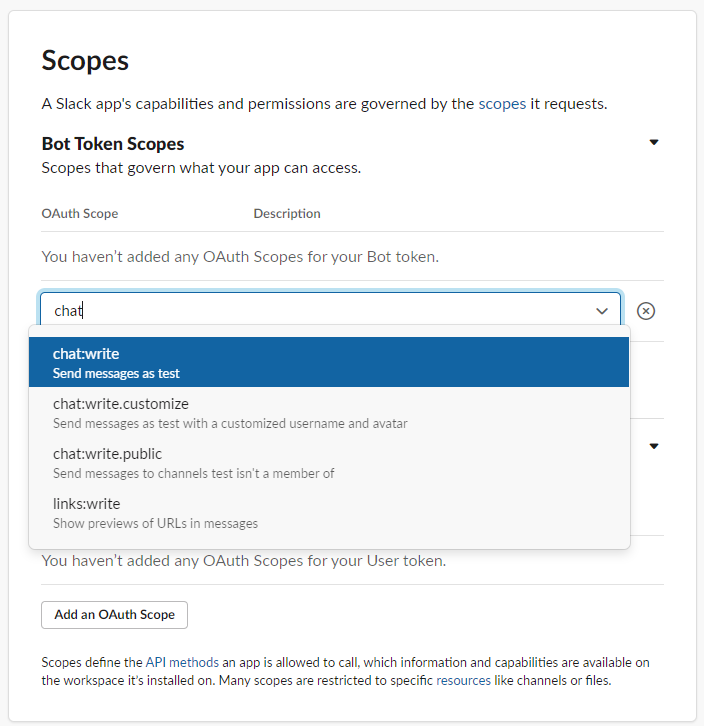
APP 추가#4
APP 추가#5
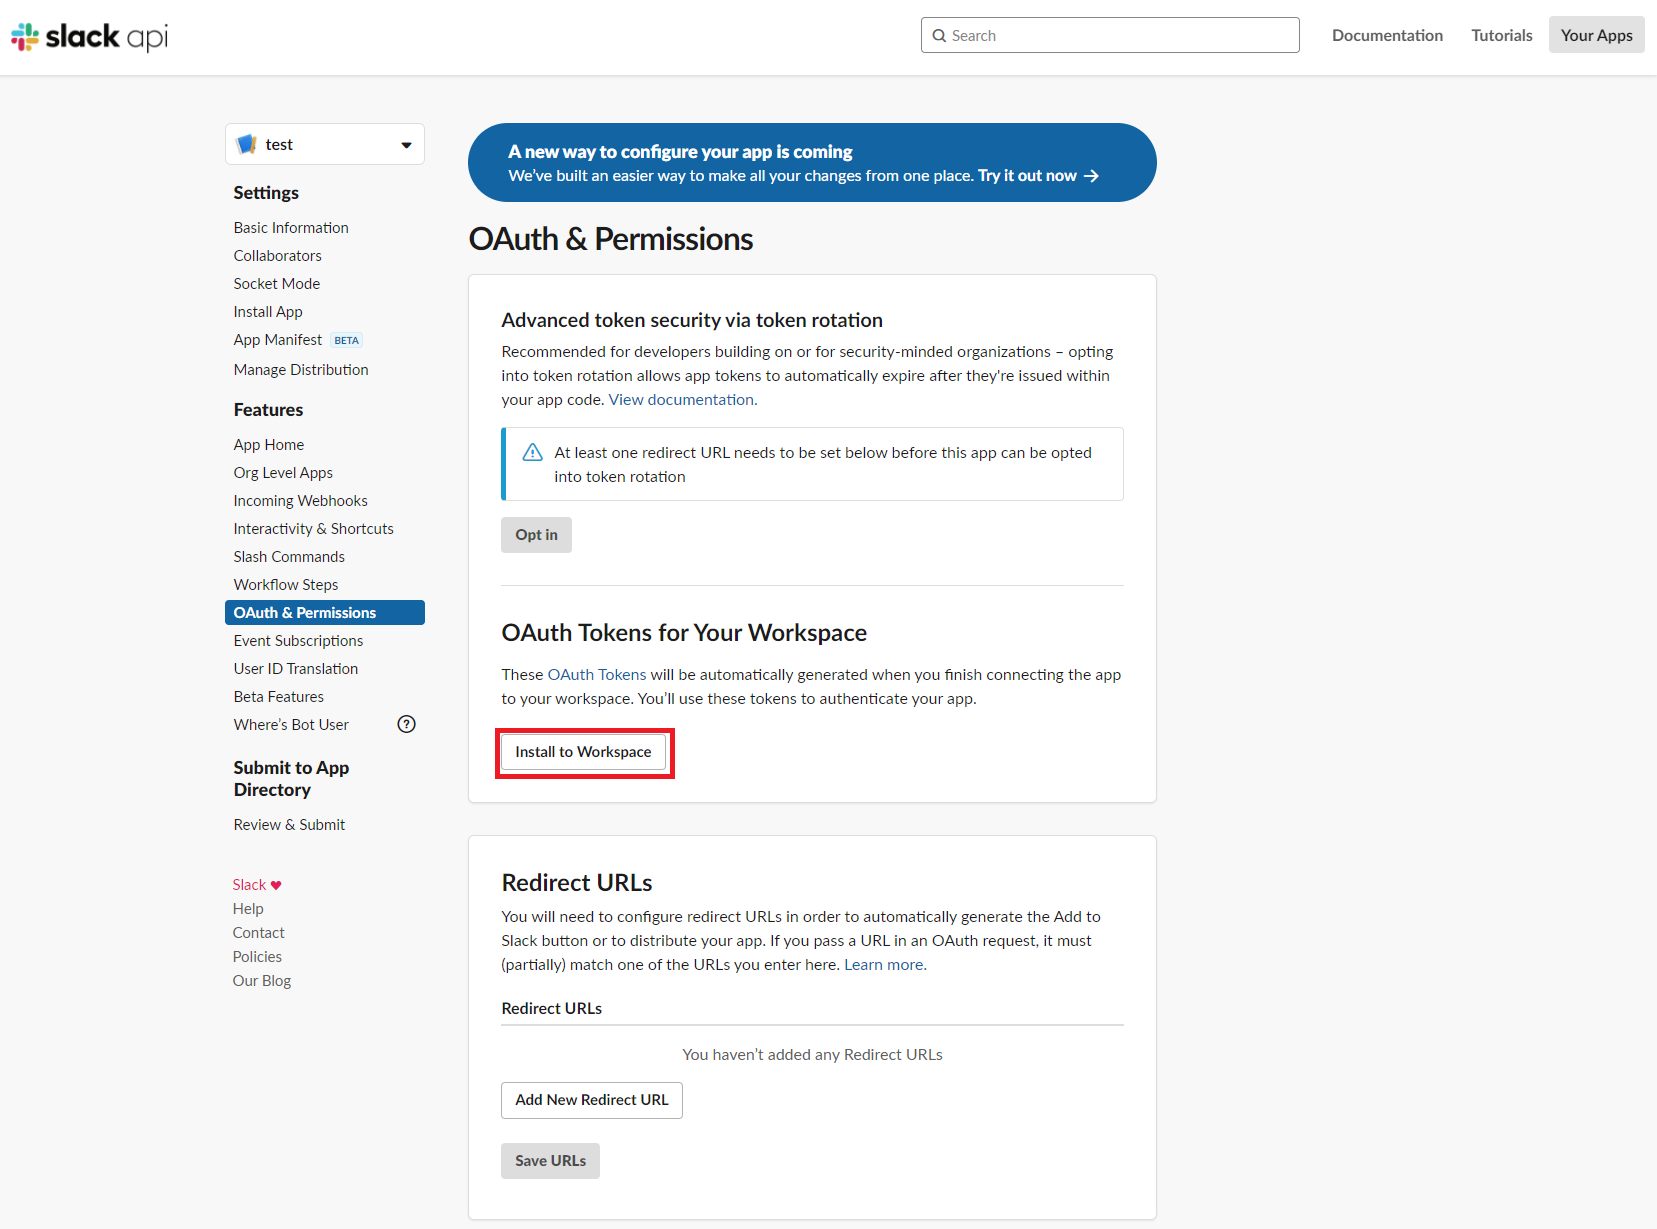
APP 추가#6
APP 추가#7
APP 추가#8
APP 추가#9
APP 추가#10
APP 추가#11
솔직히 여기 잘 나와 있다.
ARGO 설정은 별도로 UI에서 제공을 하지 않기 때문에 ConfigMap을 좀 수정 해야 한다. Helm에서 제공을 하긴 하는대 현재는 버그가 있는지 배포가 되지 않아 별도의 방법으로 구성한다.
해당 파일을 다운 로드 받은 후 실행
1
2
3
4
5
wget -O argo-noty-secret.yaml https://raw.githubusercontent.com/argoproj-labs/argocd-notifications/v1.2.1/manifests/install.yaml
wget -O argo-noty-config.yaml https://raw.githubusercontent.com/argoproj-labs/argocd-notifications/v1.2.1/catalog/install.yaml

kubectl apply -f argo-noty-secret.yaml -n argo
kubectl apply -f argo-noty-config.yaml -n argo
그리고 secret 과 configmap을 수정한다. 사전에 변경해도 상관은 없다.
 1
 2
 3
 4
 5
 6
 7
 8
 9
10
11
12
13
14
15
16
17
18
19
20
21
kubectl edit secret argocd-notifications-secret -n argo
apiVersion: v1
kind: Secret
metadata:
name: argocd-notifications-secret
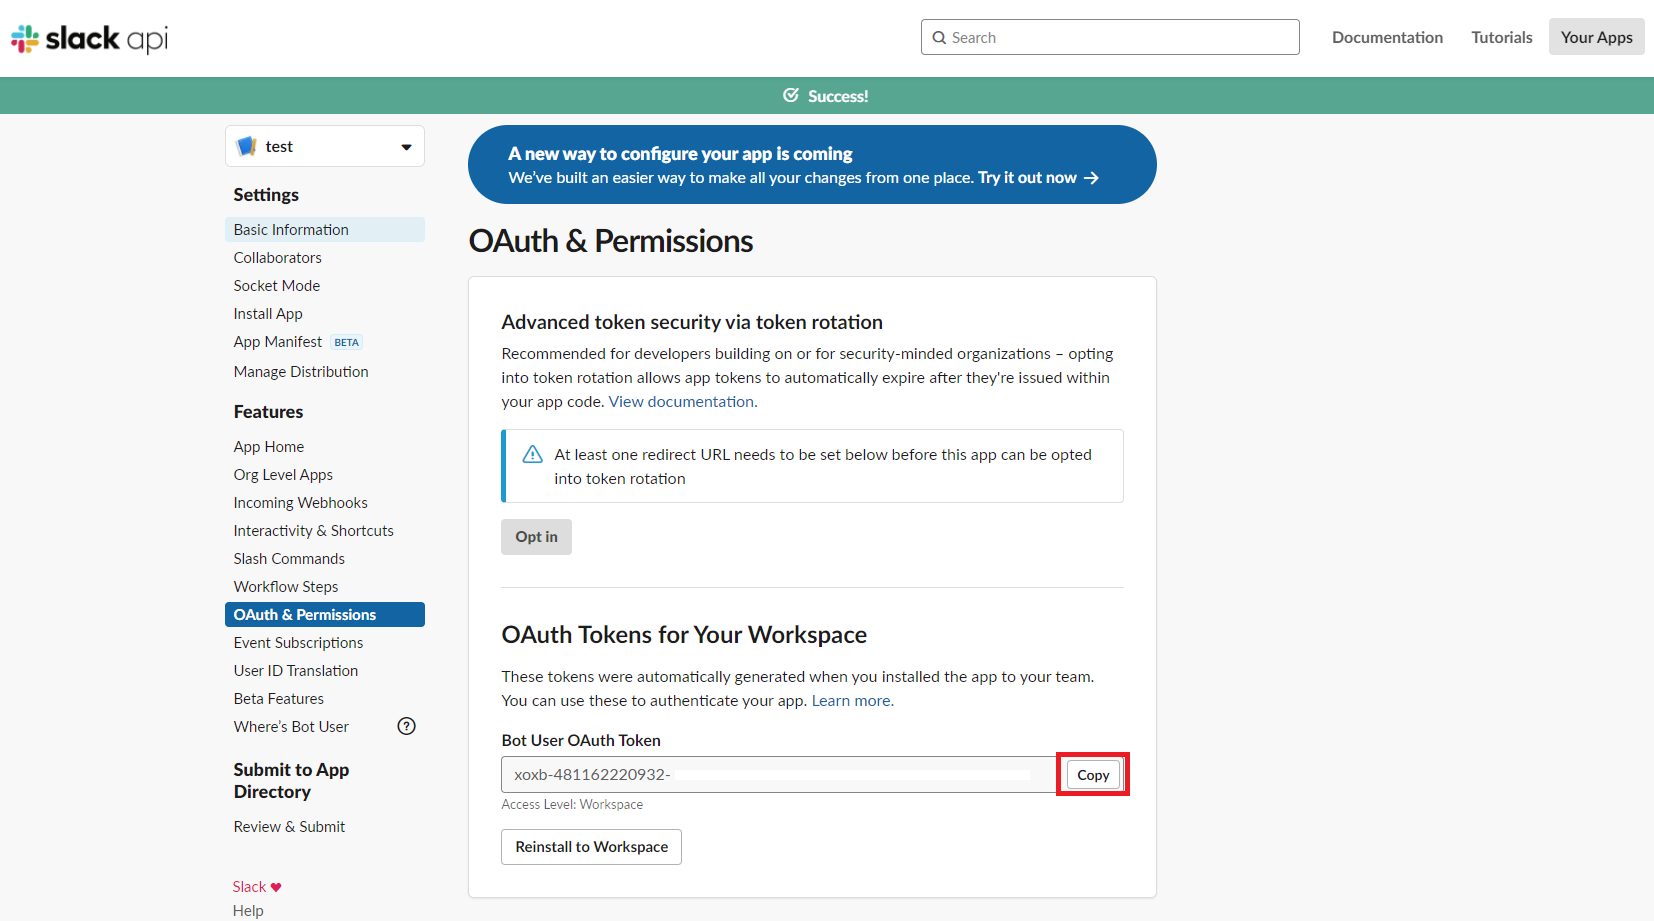
stringData:
slack-token: xoxb-xxxxxxxxxx-xxxxxxxxxx-xxxxxxx
kubectl edit cm argocd-notifications-cm -n argo
apiVersion: v1
kind: ConfigMap
metadata:
name: argocd-notifications-cm
data:
service.slack: |
## apiURL: <url> # optional URL, e.g. https://example.com/api
token: $slack -token # 위에 secret을 참고 함
## username: <override-username> # optional username
## icon: <override-icon> # optional icon for the message (supports both emoij and url notation)
Default Definition 참고.
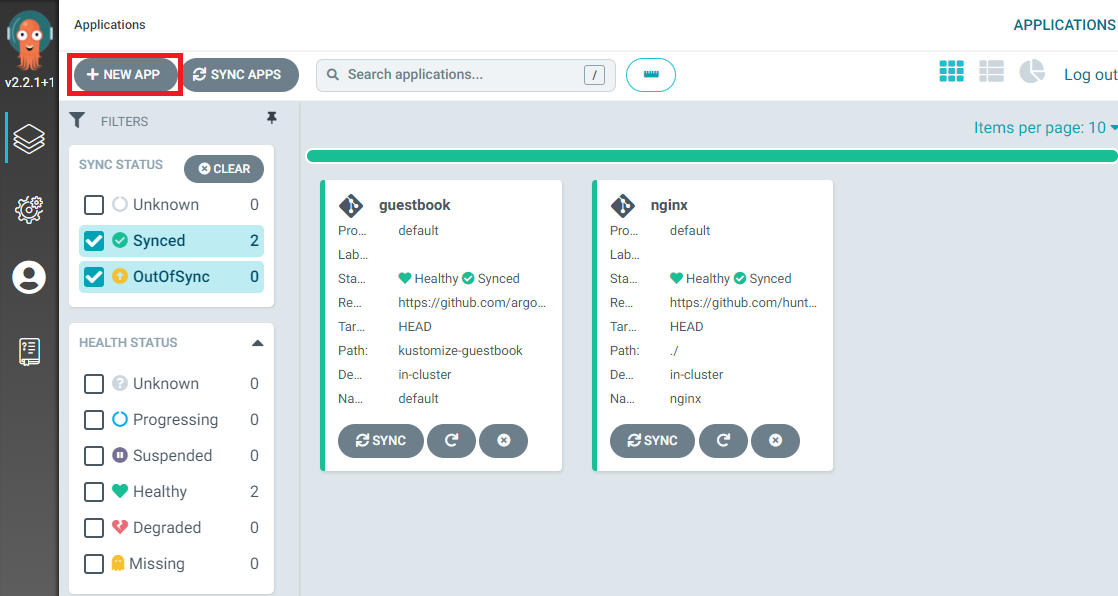
테스트를 위해 Application을 배포 한다.
 1
 2
 3
 4
 5
 6
 7
 8
 9
10
11
12
13
14
15
16
17
18
19
20
21
22
23
24
25
cat << EOF | tee guestbook.yaml
apiVersion: argoproj.io/v1alpha1
kind: Application
metadata:
  name: guestbook
  annotations:
    notifications.argoproj.io/subscribe.on-sync-succeeded.slack: dk-devops
    notifications.argoproj.io/subscribe.on-sync-succeeded.slack: dk-devops
    notifications.argoproj.io/subscribe.on-sync-failed.slack: dk-devops
    notifications.argoproj.io/subscribe.on-sync-running.slack: dk-devops
    notifications.argoproj.io/subscribe.on-sync-status-unknown.slack: dev-ops
    notifications.argoproj.io/subscribe.on-deployed.slack: dk-devops
    notifications.argoproj.io/subscribe.on-health-degraded.slack: dk-devops
spec:
  destination:
    namespace: default
    server: https://kubernetes.default.svc
  project: default
  source:
    path: kustomize-guestbook
    repoURL: https://github.com/argoproj/argocd-example-apps.git
    targetRevision: HEAD
  syncPolicy:
    automated: {}
EOF
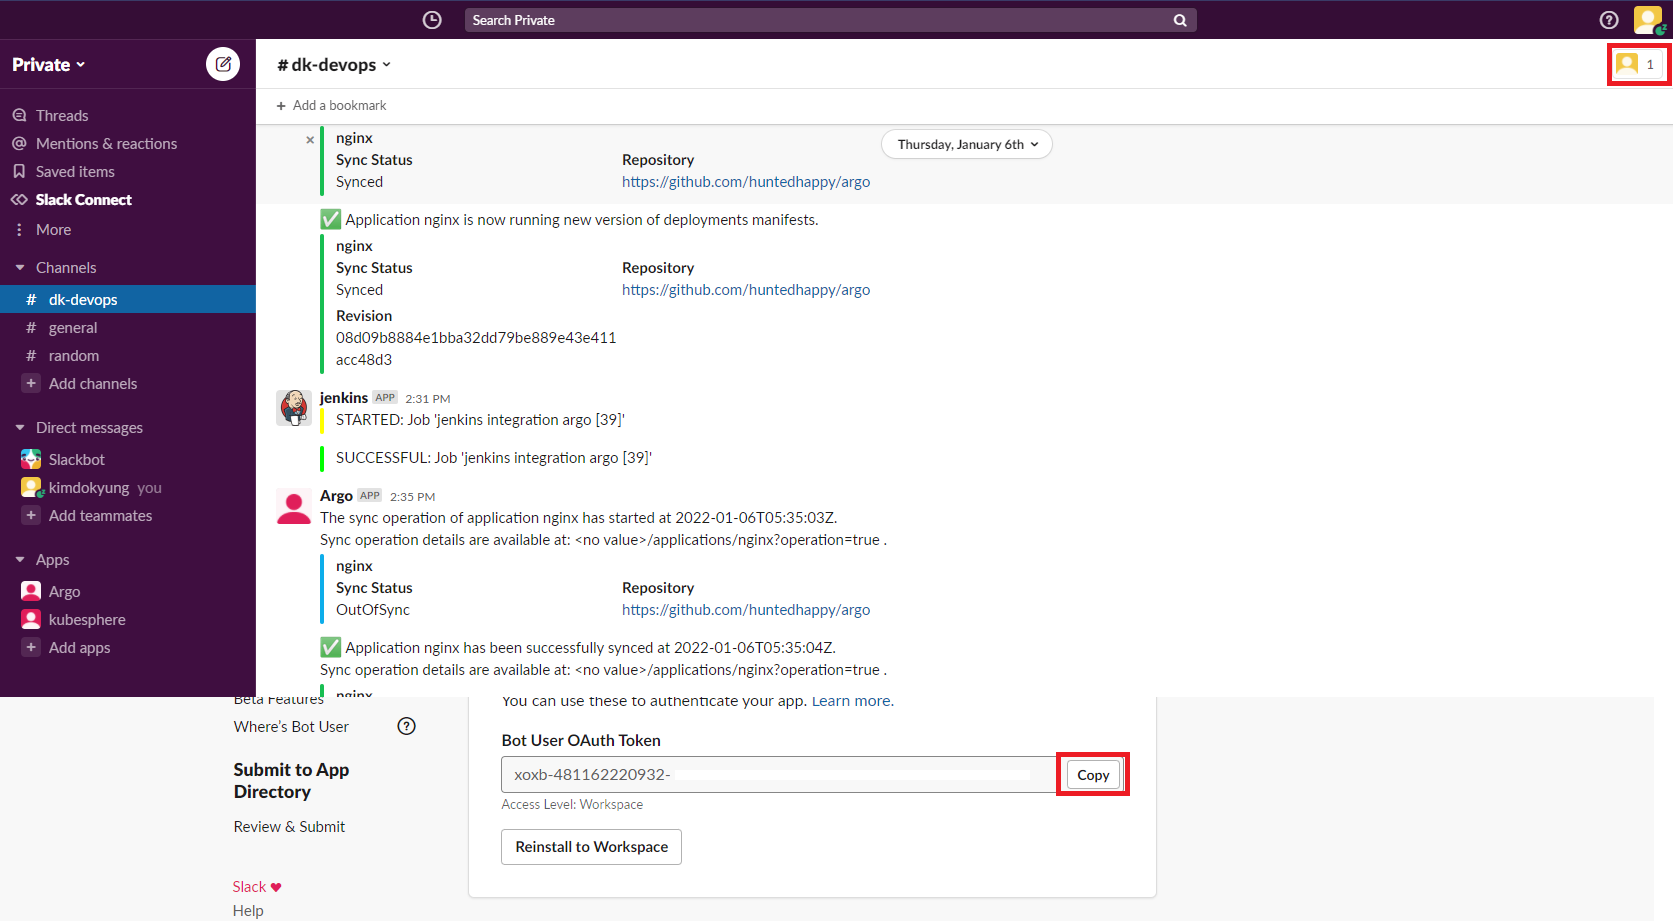
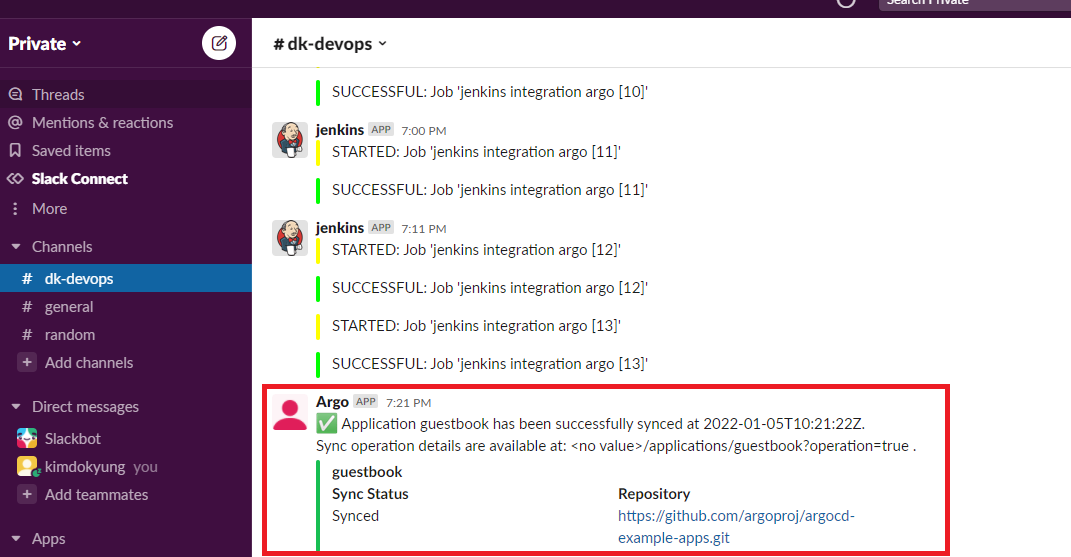
그럼 아래와 같이 Slack으로 메시지가 오는 것을 확인 할 수 있다.
SLACK 확인
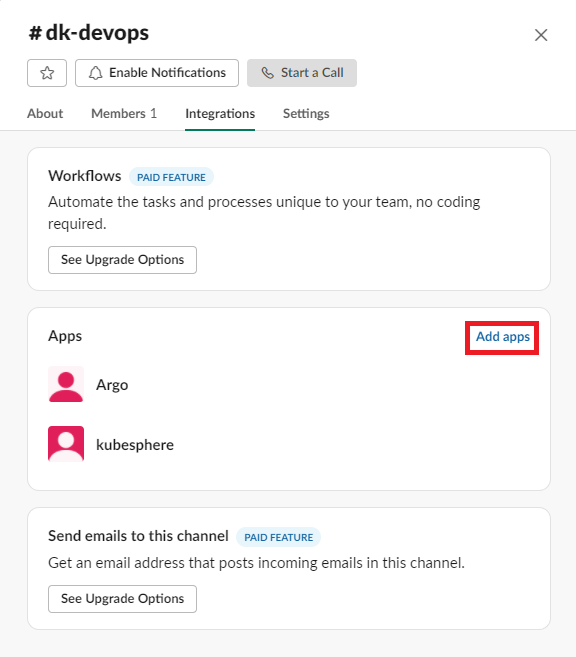
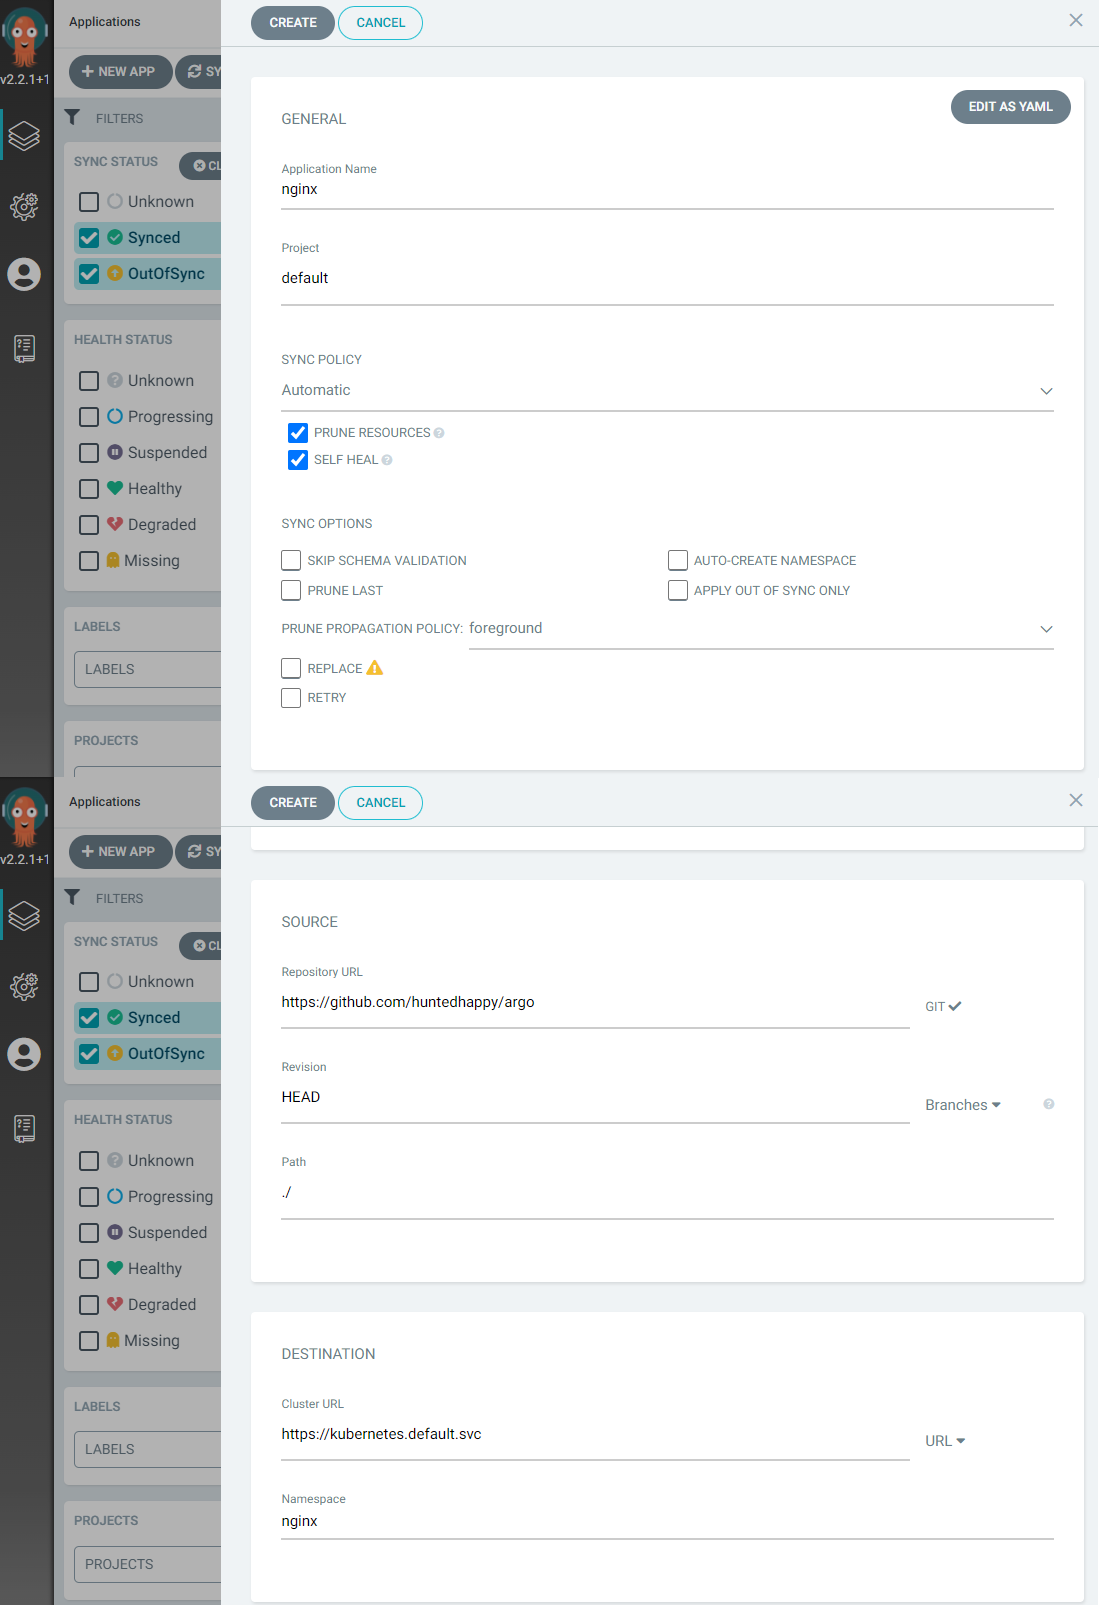
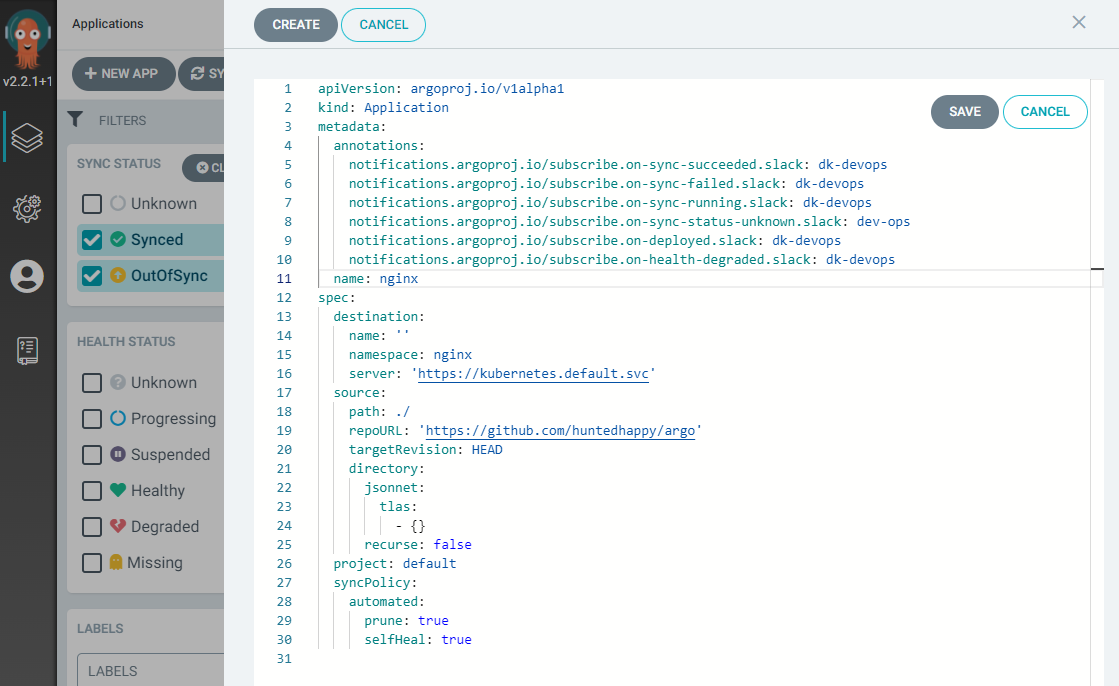
또는 UI에서 Application에 Annotation을 설정해서 확인 할 수 있다.
GUI에서 Annotation 설정#1
GUI에서 Annotation 설정#2
GUI에서 Annotation 설정#3