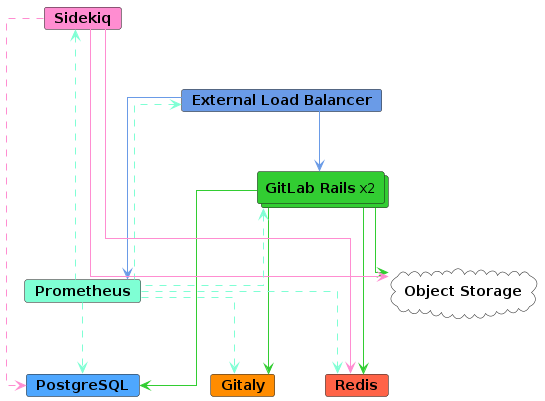
GitLab은 1000명 2000명 3000명 4000명 5000명 10,000명 25,000명 50,000명 구성을 제공하고 있다. 여기서는 2000명정도 유저가 있을 경우 GIT을 배포 하는 방법에 대해서 설명하고자 한다.
2000 유저 구조에서는 고가용성을 제공하고 있지 않기 때문에 모든 Components에 대해서 고가용성을 가져가고 싶다면 3000 유저 이상의 구조로 가져가면 좋을거 같다.
그래도 고가용성이 필요하고 3000 유저의 아키텍쳐가 부담이라면 3K 아키텍처를 축소된 고가용성으로 구성 할 수 있다.
## postgresql에 사용할 패스워드를 hsah로 생성 한다.sudo gitlab-ctl pg-password-md5 gitlab
Enter password:
Confirm password:
## 생성된 HASH값b7a289c0600988fe8e709dd2887e4d37
* 아래 파일을 수정한다.
vim /etc/gitlab/gitlab.rb
# Disable all components except PostgreSQL related onesroles(['postgres_role'])# Set the network addresses that the exporters used for monitoring will listen onnode_exporter['listen_address']='0.0.0.0:9100'postgres_exporter['listen_address']='0.0.0.0:9187'postgres_exporter['dbname']='gitlabhq_production'postgres_exporter['password']='b7a289c0600988fe8e709dd2887e4d37'## << ADD# Set the PostgreSQL address and portpostgresql['listen_address']='0.0.0.0'postgresql['port']=5432# Replace POSTGRESQL_PASSWORD_HASH with a generated md5 valuepostgresql['sql_user_password']='Pb7a289c0600988fe8e709dd2887e4d37'## << ADD# Replace APPLICATION_SERVER_IP_BLOCK with the CIDR address of the application nodepostgresql['trust_auth_cidr_addresses']= %w(127.0.0.1/32 10.253.126.0/24)# Prevent database migrations from running on upgrade automaticallygitlab_rails['auto_migrate']=false## 저장 완료 후 아래 명령어를 통해 GitLab을 재 설정 해준다.gitlab-ctl reconfigure
## 완료 후 DB 테이블을 확인 할 수 있다.## 또는 아래 명령어를 입력 하면sudo gitlab-rake gitlab:db:decomposition:connection_status
## 아래와 같이 나오는 것을 확인 할 수 있다.GitLab database already running on two connections
* 아래 파일을 수정한다.
vim /etc/gitlab/gitlab.rb
## Enable Redisroles(["redis_master_role"])redis['bind']='0.0.0.0'redis['port']=6379redis['password']='SECRET_PASSWORD_HERE'gitlab_rails['enable']=false# Set the network addresses that the exporters used for monitoring will listen onnode_exporter['listen_address']='0.0.0.0:9100'redis_exporter['listen_address']='0.0.0.0:9121'redis_exporter['flags']={'redis.addr'=> 'redis://0.0.0.0:6379',
'redis.password'=> 'SECRET_PASSWORD_HERE',
}
# Avoid running unnecessary services on the Gitaly serverpostgresql['enable']=falseredis['enable']=falsenginx['enable']=falsepuma['enable']=falsesidekiq['enable']=falsegitlab_workhorse['enable']=falseprometheus['enable']=falsealertmanager['enable']=falsegitlab_exporter['enable']=falsegitlab_kas['enable']=false# Prevent database migrations from running on upgrade automaticallygitlab_rails['auto_migrate']=false# Configure the gitlab-shell API callback URL. Without this, `git push` will# fail. This can be your 'front door' GitLab URL or an internal load# balancer.gitlab_rails['internal_api_url']='https://gitlab.huntedhappy.kro.kr'# Gitalygitaly['enable']=true# The secret token is used for authentication callbacks from Gitaly to the GitLab internal API.# This must match the respective value in GitLab Rails application setup.gitlab_shell['secret_token']='shellsecret'# Set the network addresses that the exporters used for monitoring will listen onnode_exporter['listen_address']='0.0.0.0:9100'gitaly['configuration']={# ...## Make Gitaly accept connections on all network interfaces. You must use# firewalls to restrict access to this address/port.# Comment out following line if you only want to support TLS connections listen_addr: '0.0.0.0:8075',
prometheus_listen_addr: '0.0.0.0:9236',
# Gitaly Auth Token# Should be the same as praefect_internal_token auth: {# ...## Gitaly's authentication token is used to authenticate gRPC requests to Gitaly. This must match# the respective value in GitLab Rails application setup. token: 'gitalysecret',
},
# Gitaly Pack-objects cache# Recommended to be enabled for improved performance but can notably increase disk I/O# Refer to https://docs.gitlab.com/ee/administration/gitaly/configure_gitaly.html#pack-objects-cache for more info pack_objects_cache: {# ... enabled: true,
},
storage: [{ name: 'default',
path: '/var/opt/gitlab/git-data',
},
],
}
vi /etc/gitlab/gitlab.rb
external_url 'https://gitlab.huntedhappy.kro.kr'# Gitaly and GitLab use two shared secrets for authentication, one to authenticate gRPC requests# to Gitaly, and a second for authentication callbacks from GitLab-Shell to the GitLab internal API.# The following two values must be the same as their respective values# of the Gitaly setupgitlab_rails['gitaly_token']='gitalysecret'gitlab_shell['secret_token']='shellsecret'git_data_dirs({'default'=> {'gitaly_address'=> 'tcp://10.253.126.129:8075'},
})## Disable components that will not be on the GitLab application serverroles(['application_role', 'sidekiq_role'])gitaly['enable']=false## PostgreSQL connection detailsgitlab_rails['db_adapter']='postgresql'gitlab_rails['db_encoding']='unicode'gitlab_rails['db_host']='10.253.126.123'# IP/hostname of database servergitlab_rails['db_password']='Password'## Redis connection detailsgitlab_rails['redis_port']='6379'gitlab_rails['redis_host']='10.253.126.120'# IP/hostname of Redis servergitlab_rails['redis_password']='Password'## Prevent database migrations from running on upgrade automaticallygitlab_rails['auto_migrate']=false# Set the network addresses that the exporters used for monitoring will listen onnode_exporter['listen_address']='0.0.0.0:9100'gitlab_workhorse['prometheus_listen_addr']='0.0.0.0:9229'puma['listen']='0.0.0.0'# Sidekiqsidekiq['enable']=truesidekiq['listen_address']="0.0.0.0"# Configure Sidekiq with 2 workers and 20 max concurrencysidekiq['max_concurrency']=20sidekiq['queue_groups']=['*'] * 4# Add the monitoring node's IP address to the monitoring whitelist and allow it to# scrape the NGINX metrics. Replace placeholder `monitoring.gitlab.example.com` with# the address and/or subnets gathered from the monitoring nodegitlab_rails['monitoring_whitelist']=['10.253.0.0/16', '127.0.0.0/8']nginx['status']['options']['allow']=['10.253.0.0/16', '127.0.0.0/8']# Object Storage## This is an example for configuring Object Storage on GCP## Replace this config with your chosen Object Storage provider as desiredgitlab_rails['object_store']['enabled']=truegitlab_rails['object_store']['connection']={'provider'=> 'AWS',
'endpoint'=> 'https://minio-volumes.huntedhappy.kro.kr',
'path_style'=> true,
'aws_access_key_id'=> 'minioadmin',
'aws_secret_access_key'=> '',
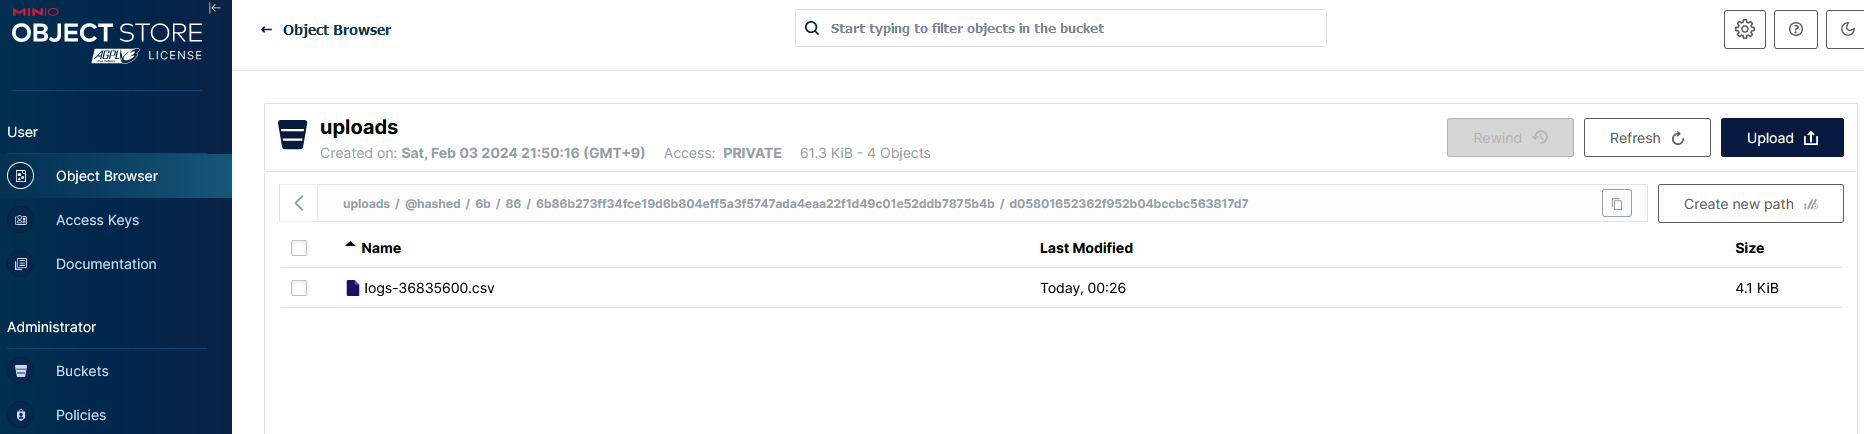
'region'=> 'us-west'}gitlab_rails['object_store']['objects']['artifacts']['bucket']="artifacts"gitlab_rails['object_store']['objects']['external_diffs']['bucket']="external-diffs"gitlab_rails['object_store']['objects']['lfs']['bucket']="lfs"gitlab_rails['object_store']['objects']['uploads']['bucket']="uploads"gitlab_rails['object_store']['objects']['packages']['bucket']="packages"gitlab_rails['object_store']['objects']['dependency_proxy']['bucket']="dependency-proxy"gitlab_rails['object_store']['objects']['terraform_state']['bucket']="terraform-state"#### END ######################################################################sudo touch /etc/gitlab/skip-auto-reconfigure
gitlab-ctl reconfigure
gitlab-ctl restart
gitlab-ctl status
## DB 마이그레이션 sudo gitlab-rake gitlab:db:configure
## 첫 번 째가 완료 되면 두번째는 아래와 같이 재 설정만 해주면 된다.gitlab-ctl reconfigure
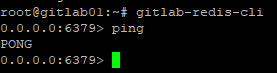
설정이 완료 되면 Gitaly Host에서 아래 명령어를 통해 정상 여부를 확인 할 수 있다.